Deploy your chatbot with Google Tag Manager
What’s a Rich Text element?
The rich text element allows you to create and format headings, paragraphs, blockquotes, images, and video all in one place instead of having to add and format them individually. Just double-click and easily create content.
Static and dynamic content editing
A rich text element can be used with static or dynamic content. For static content, just drop it into any page and begin editing. For dynamic content, add a rich text field to any collection and then connect a rich text element to that field in the settings panel. Voila!
How to customize formatting for each rich text
Headings, paragraphs, blockquotes, figures, images, and figure captions can all be styled after a class is added to the rich text element using the "When inside of" nested selector system.
Google Tag Manager is a tag management system (TMS) that allows you to quickly and easily update code snippet on your website or app. By using GTM to add your chatbot to your website, you can have a quick overview of all scripts and featurse intalled on your website.
Ideta GTM template
How to add Ideta's GTM template to your workspace?
1. Open the Google Tag Manager Dashboard of your corresponding workspace

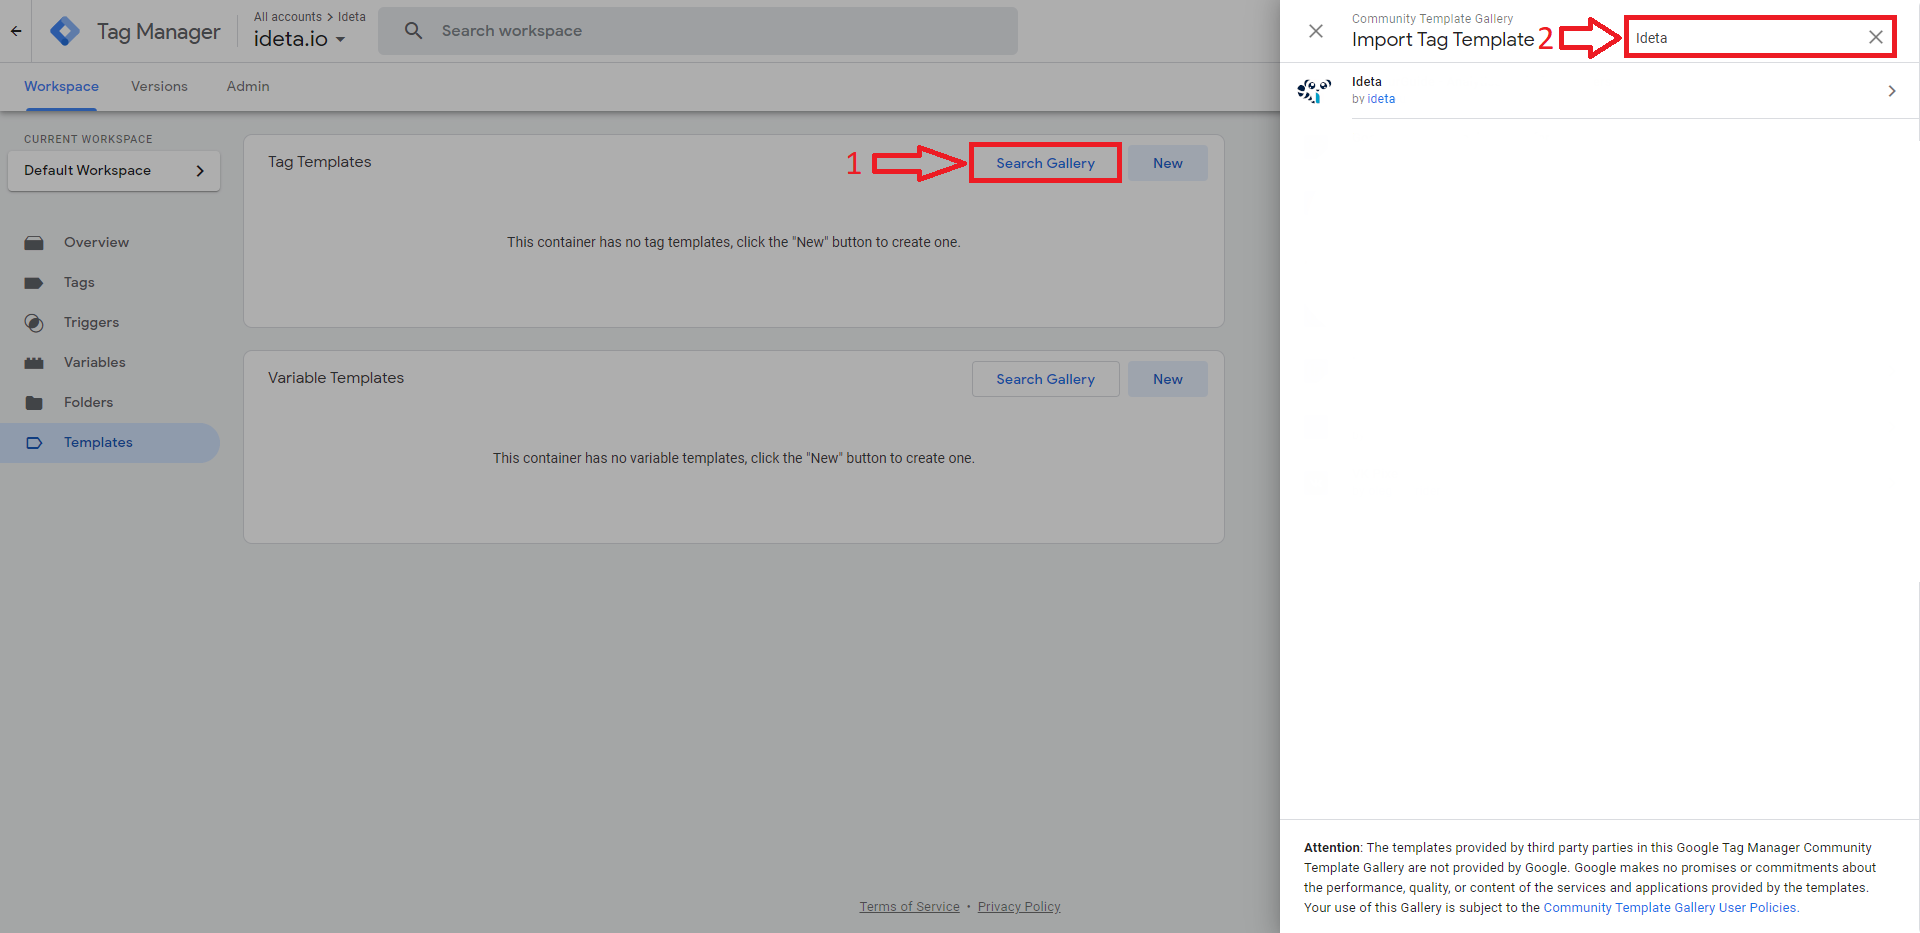
Then, on the Tag Templates Section, click on "Search Gallery" and type "Ideta" on the search bar.

Accept and add Ideta's template.
Ideta GTM template is now on your workspace! We just have to use it.
How to set up your template to your workspace
Go to your Tag menu and create a new Tag.
In the Tag Type window, choose "Ideta"
How to find your bot's ID and URL in Ideta
Go to the "Publish" section of your chatbot. You'll find all the code needed for the GTM installation

Past the code in the corresponding field.
For the triggers, you can add "All Pages" if you want your chatbot to appears on all the pages of your website, or target specific pages.
Publish your workspace!

.jpg)


