Chatbot Integrations - Tutorial for All Platforms
What’s a Rich Text element?
The rich text element allows you to create and format headings, paragraphs, blockquotes, images, and video all in one place instead of having to add and format them individually. Just double-click and easily create content.
Static and dynamic content editing
A rich text element can be used with static or dynamic content. For static content, just drop it into any page and begin editing. For dynamic content, add a rich text field to any collection and then connect a rich text element to that field in the settings panel. Voila!
How to customize formatting for each rich text
Headings, paragraphs, blockquotes, figures, images, and figure captions can all be styled after a class is added to the rich text element using the "When inside of" nested selector system.
Before All - Build Your Chatbot
Chatbots can serve many purposes, you have to define what you want your chatbot to do and build it, according to the best practices.
With Ideta’s chatbot builder, you can make chatbots, voicebots and callbots in a few days and without any coding at all. Simply create your bubble’s content and link it to another one to make your conversation flow.

Once you have a world-ready chatbot, you can deploy it on several channels.
Get your integration script
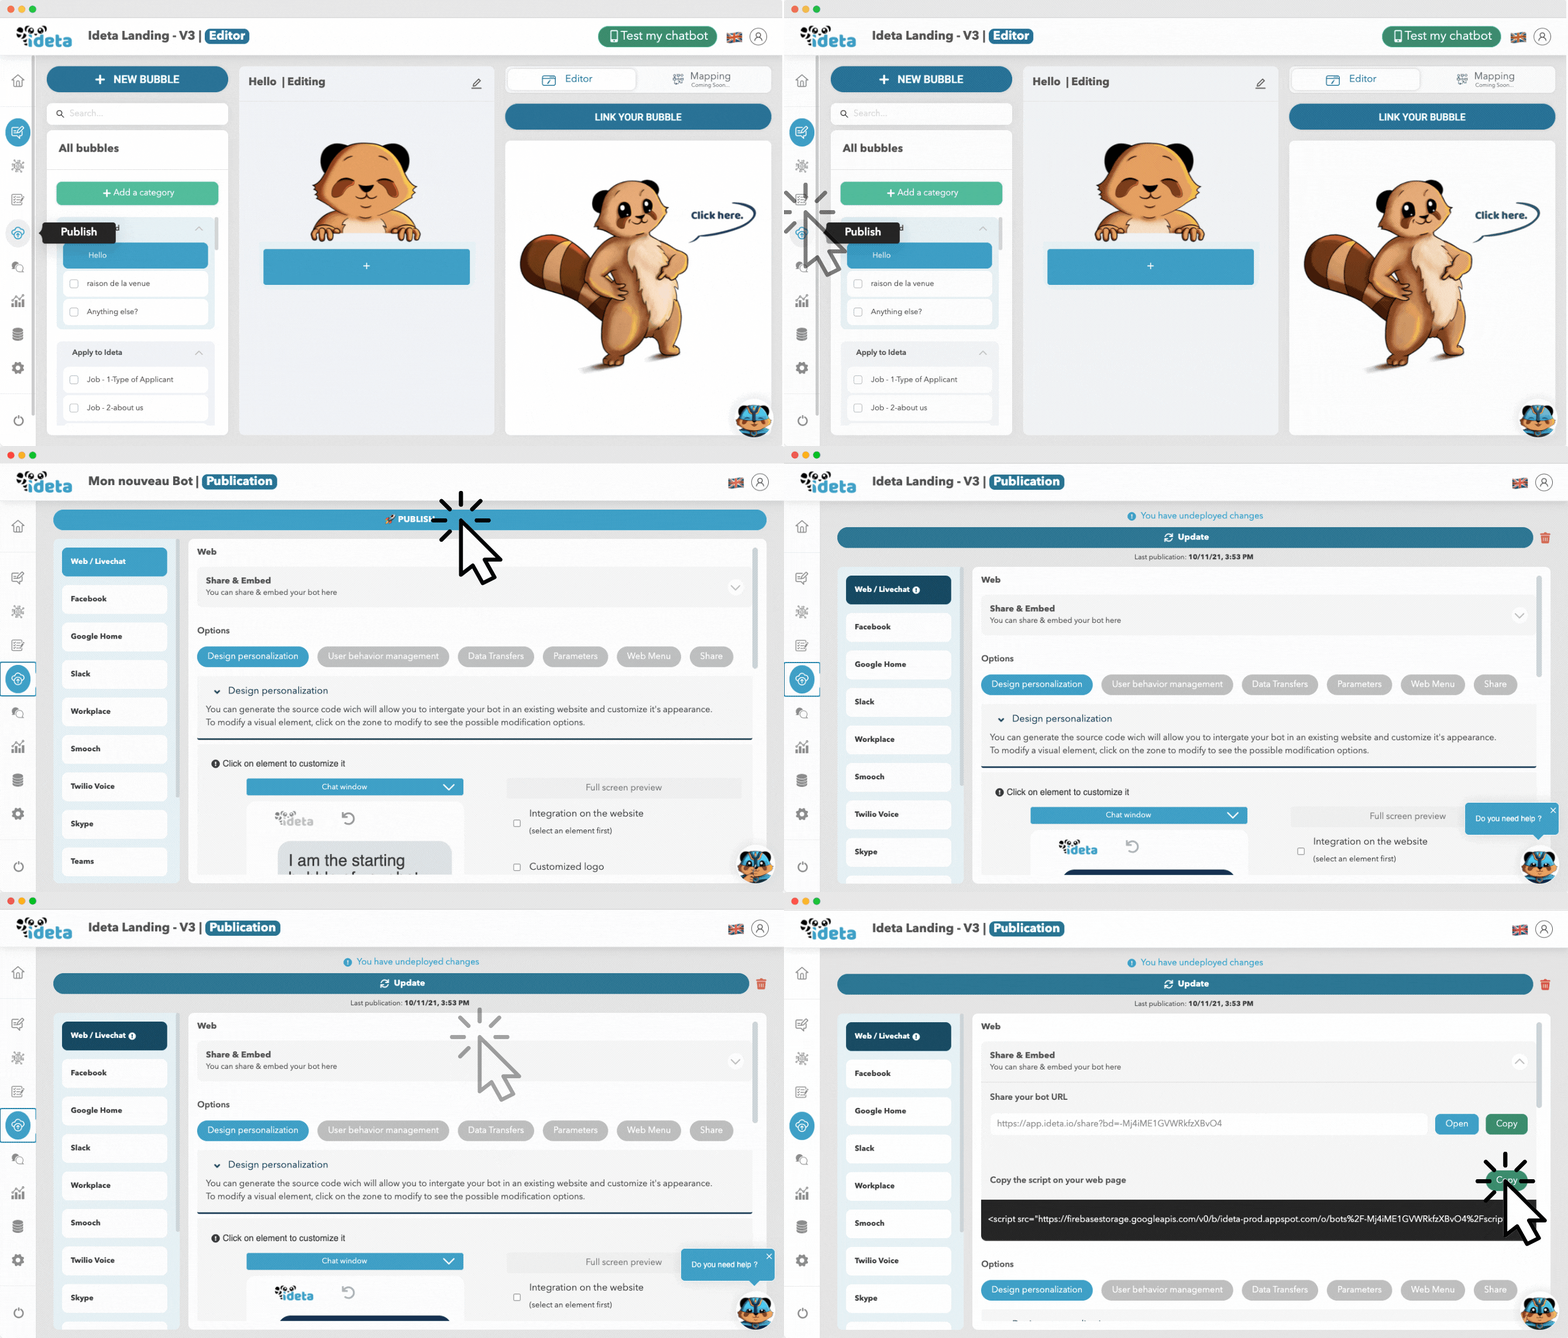
Before all, you will need to get your chatbot script. You can find it in the “Publish” section.
- Go to “Publish”
- Publish your bot if it’s not already done
- Open the “Share & Embed” section
- Copy your script
Integration on Wordpress
Wordpress is one of the most used CMS on the planet, it is powering 40% of all websites on the internet. Its open source and it has a lot of plugin you can use to build your website or even, ecommerce store.
You can easily add a chatbot to your Wordpress website in several ways.
By adding custom code
By using Ideta’s plugin
Integration on Shopify
Shopify is one of the most renowned ecommerce platform. It enables you to set up a store in a matters of hours. Adding a chatbot to your Shopify website can boost your sales greatly. A chatbots can answer your prospect’s questions and enable your current customer to get informations on their order.
On all your website
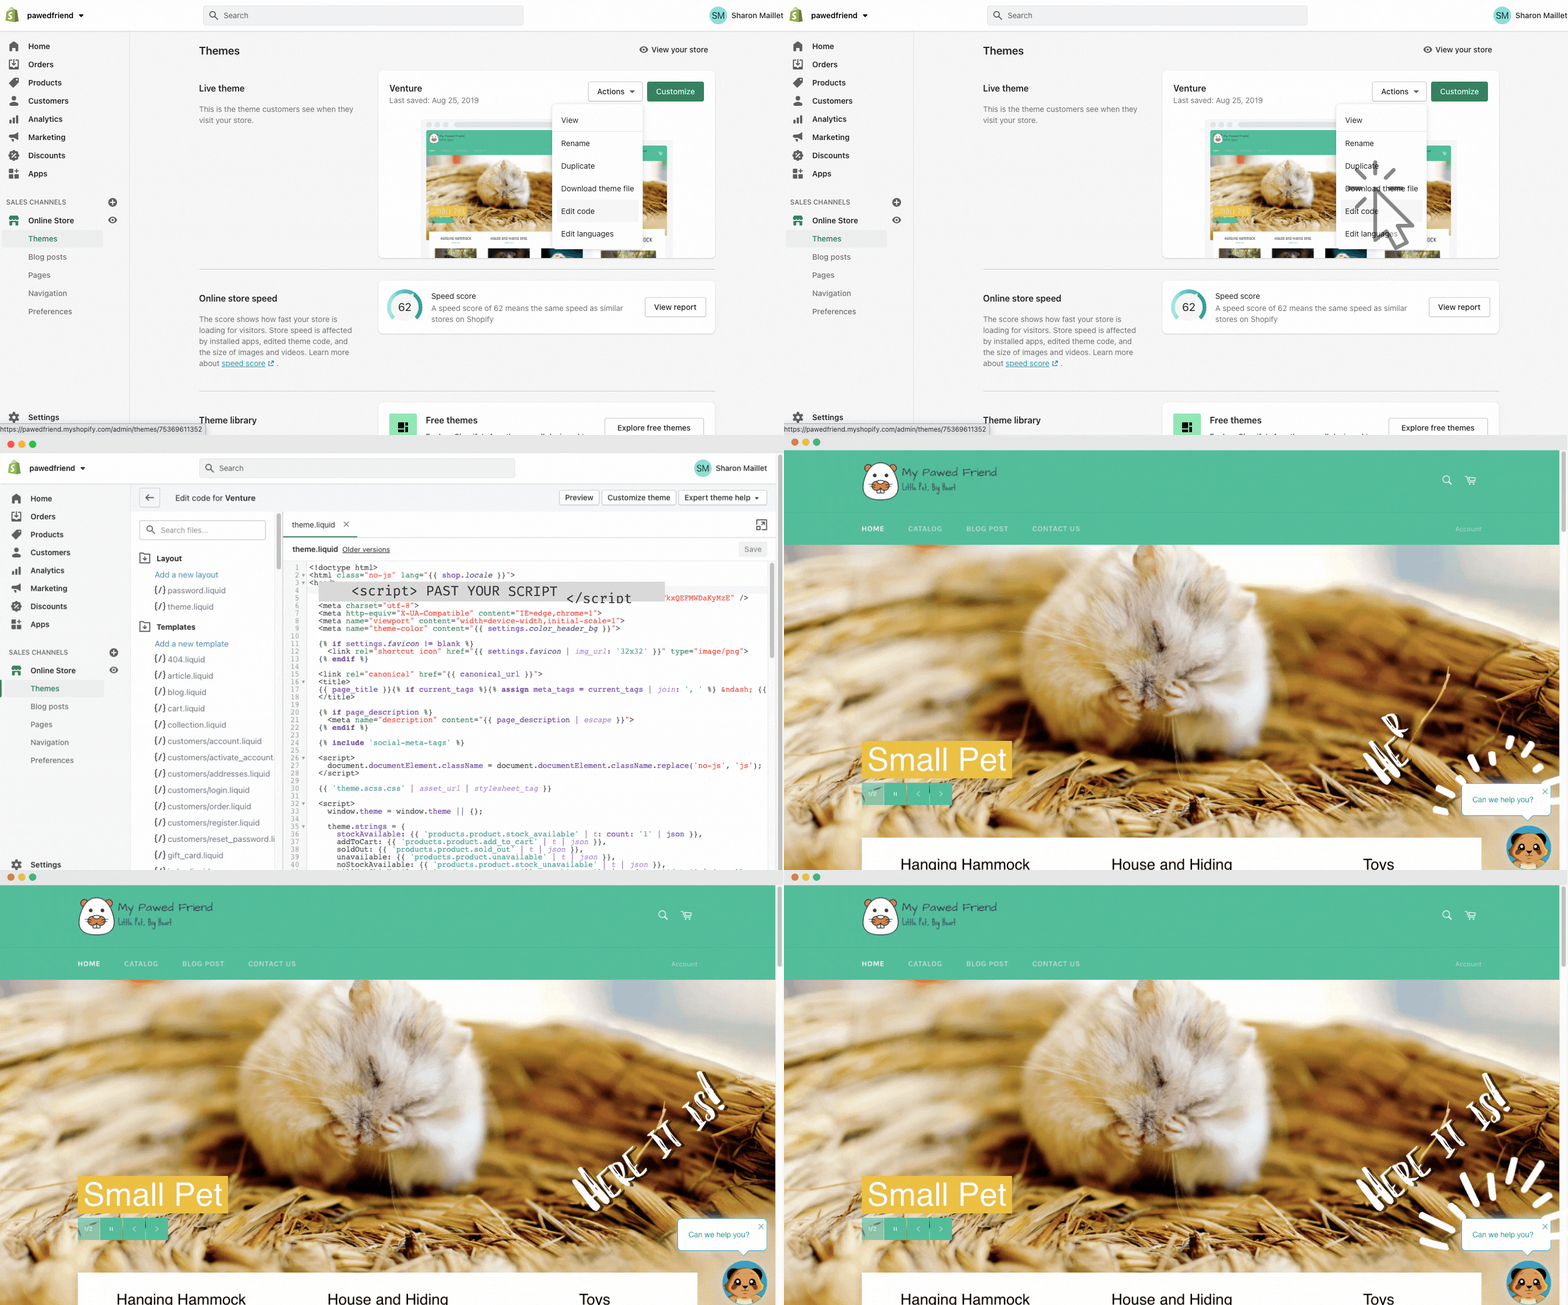
To add a chatbot to all the pages of your website, follow the steps below :
- Go to your Code Edit panel
- Past your script in the head section of the “theme.liquid” file
- Save and publish your website!
On a single page of your website
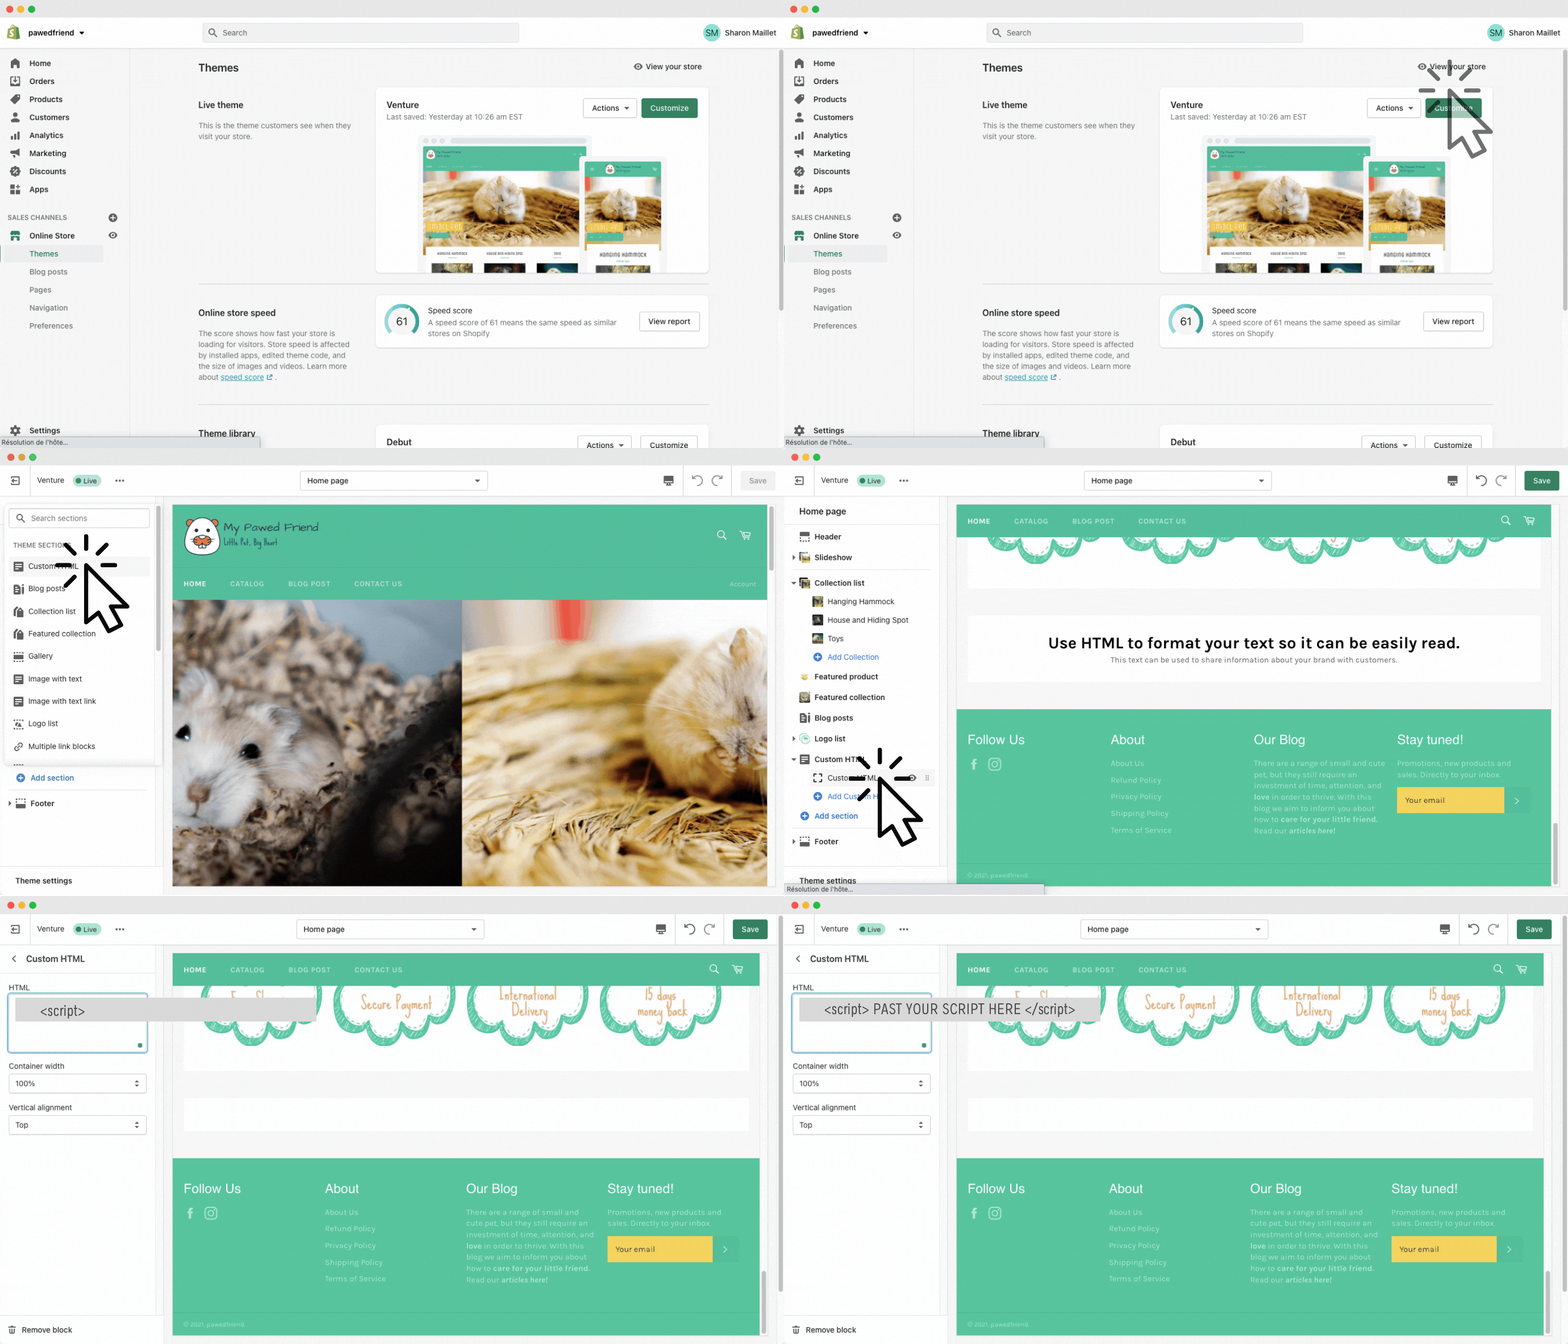
To add a chatbot on single specific page of your website, follow the steps below :
- Add a “Custom HTML” element
- Copy and past your script
- Save and publish
Integration on Webflow
Webflow is a website builder that focus on designing and building beautiful website without coding. Its interface enables designer to make their idea live without hassle, it is powerful enough to give a truly personalized feel to your website.
Adding Ideta’s chatbot to your Webflow website is perfect because Ideta chatbot builder is also quite customizable. You can make your chatbot truly match your brand by modifying its pop-up design, but also its bubble’s colors, size and more
On all your website
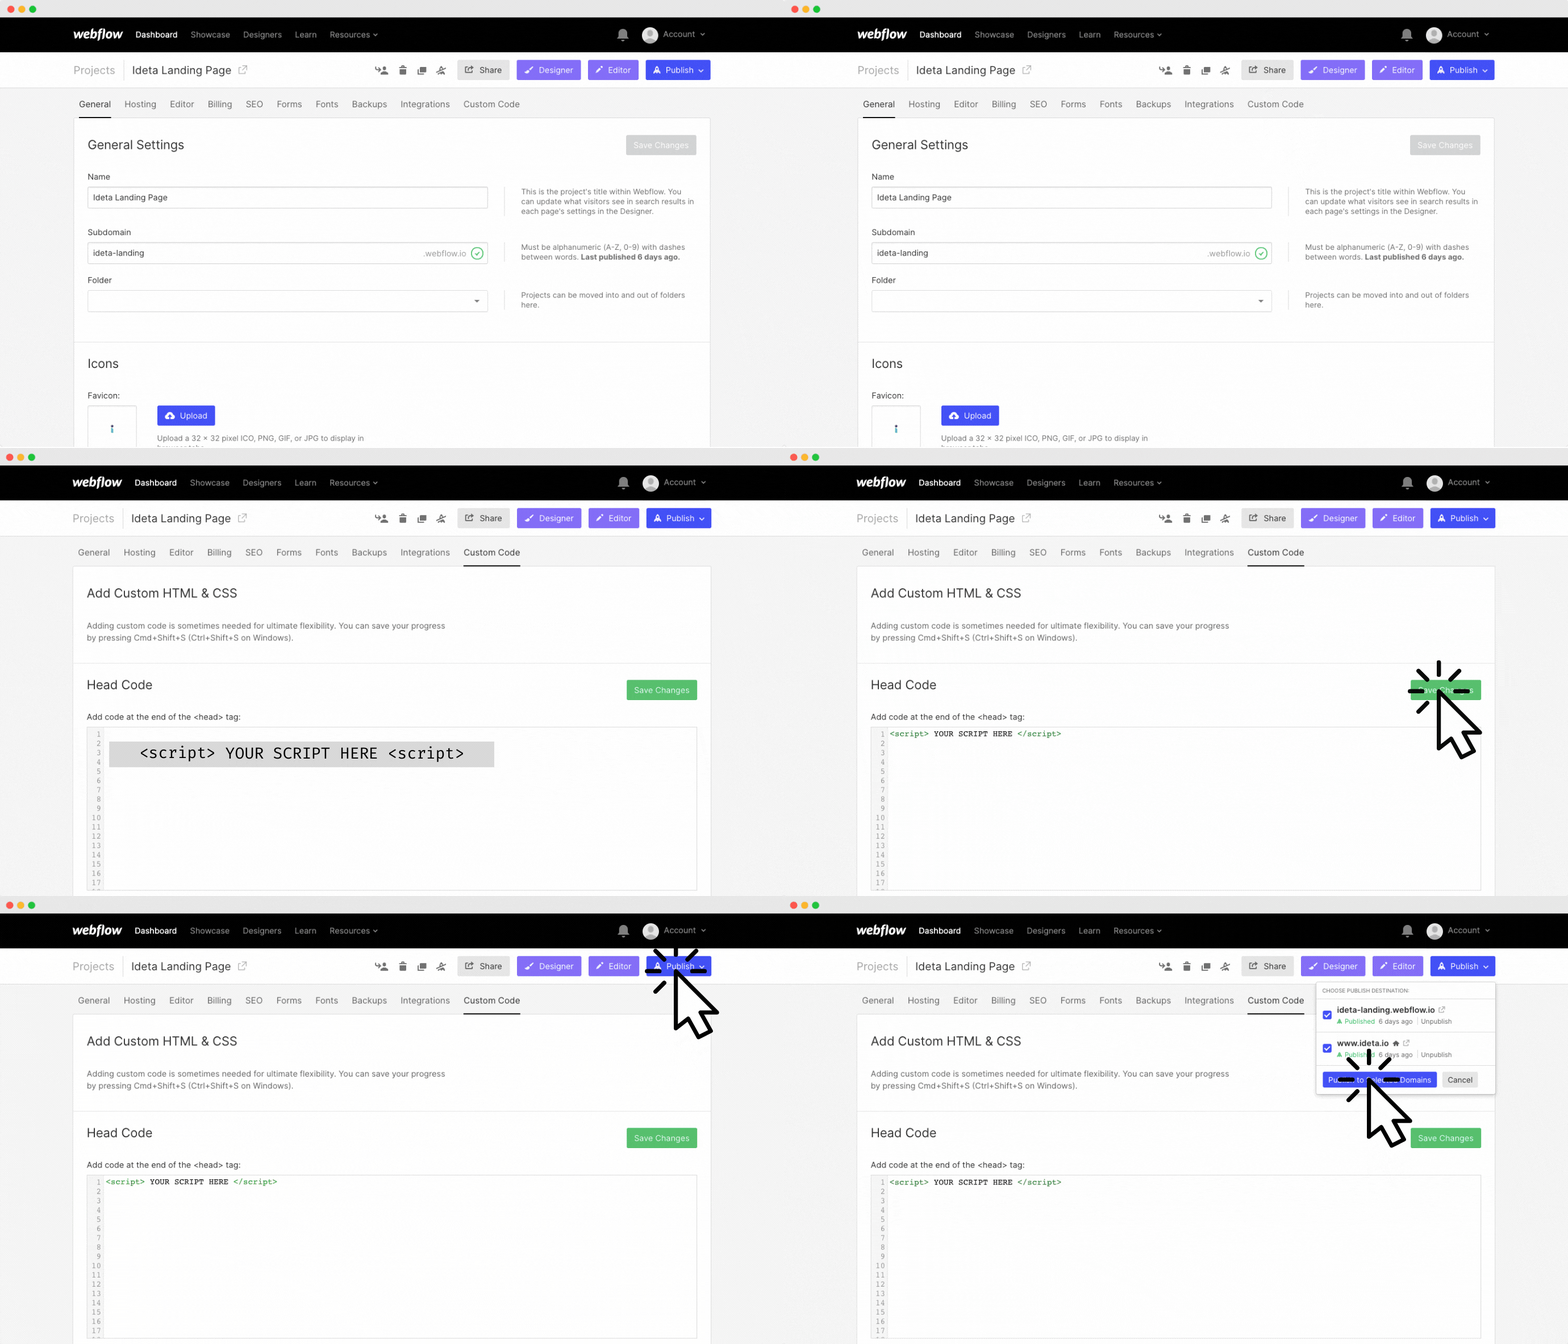
To add the chatbot to all the pages of your website, follow the steps below:
- Go to your “Custom Code” editor
- Past your script in the Head section
- Save the changes
- Don’t forget to publish to all your domains!
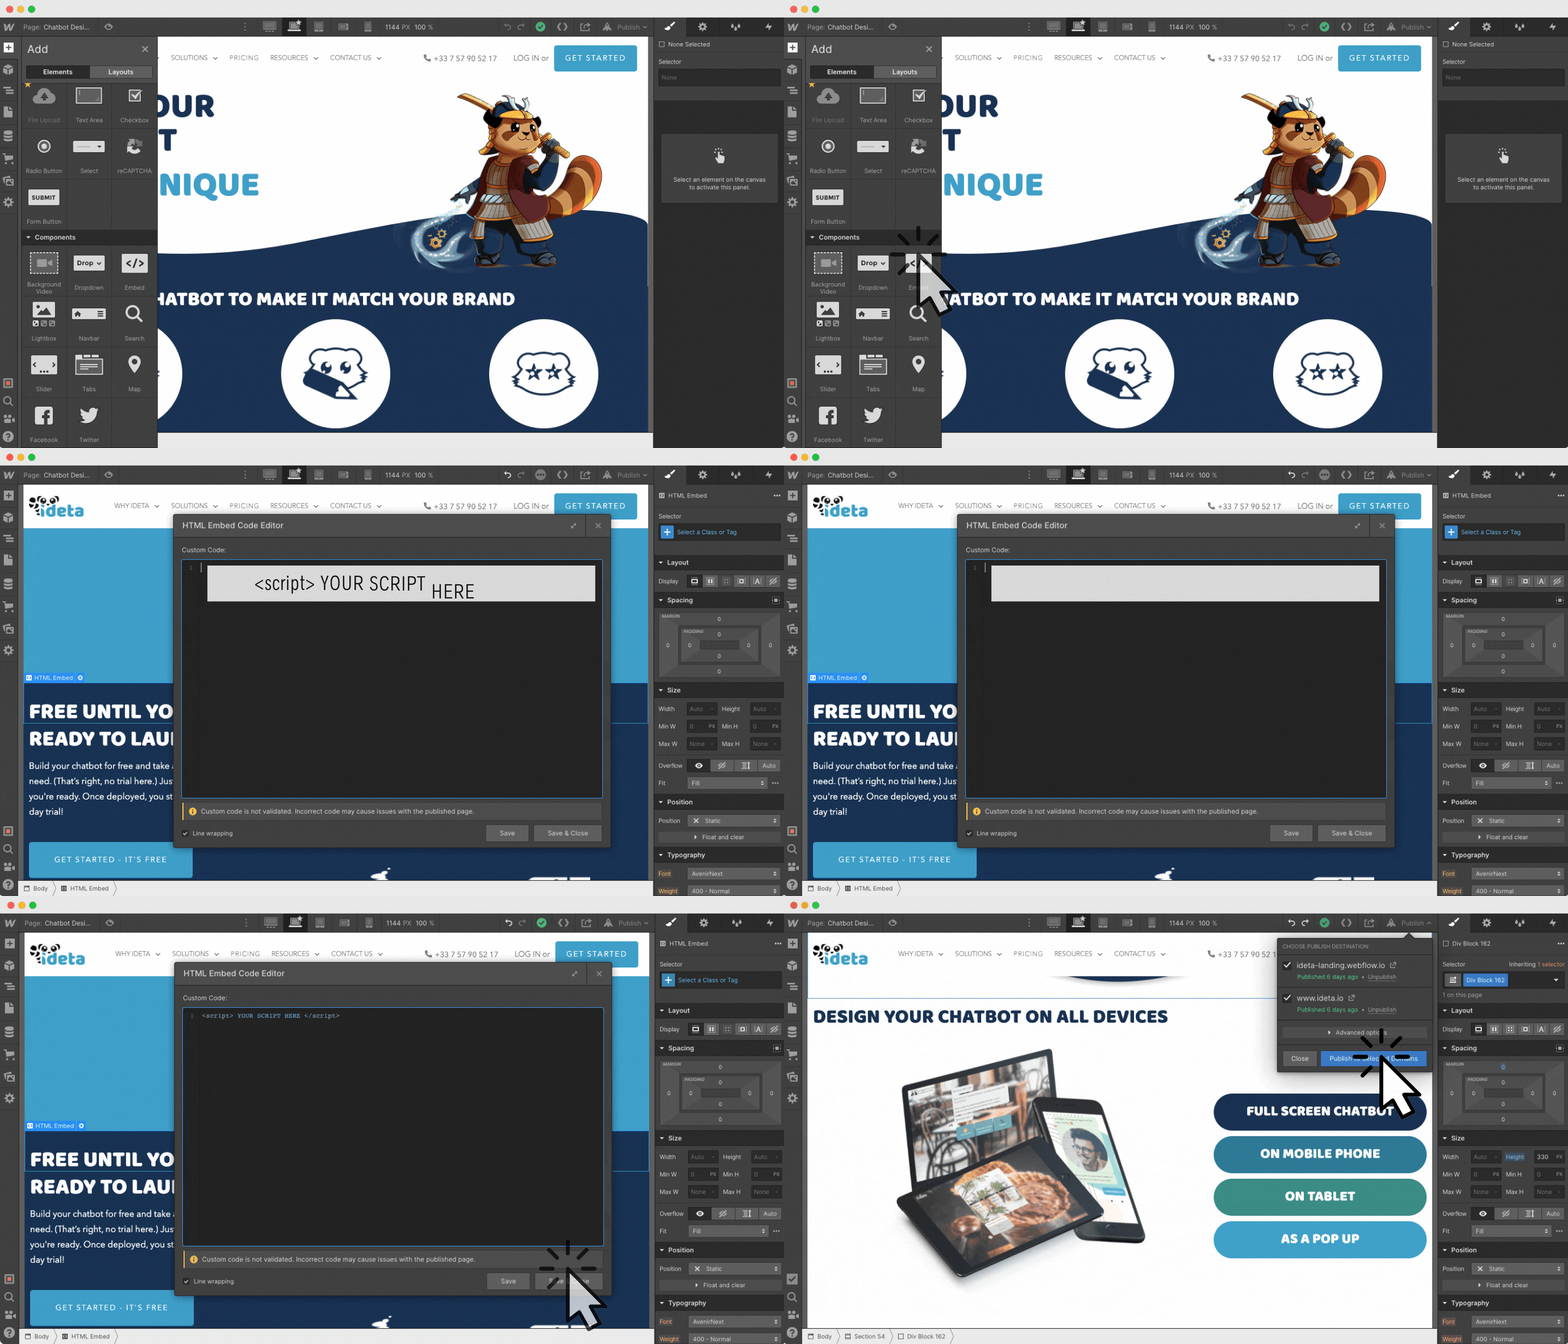
On a single page
To add a chatbot on single specific page of your website, follow the steps below :
- Add a “Embed” element
- Copy and past your script
- Save and close
- Publish your website to all domains
Integration on SquareSpace
SquareSpace is a really easy to use website builder. It provide their users with tons of beautiful templates. By adding a chatbot to your SquareSpace website, you make sure that your visitor can contact you easily.
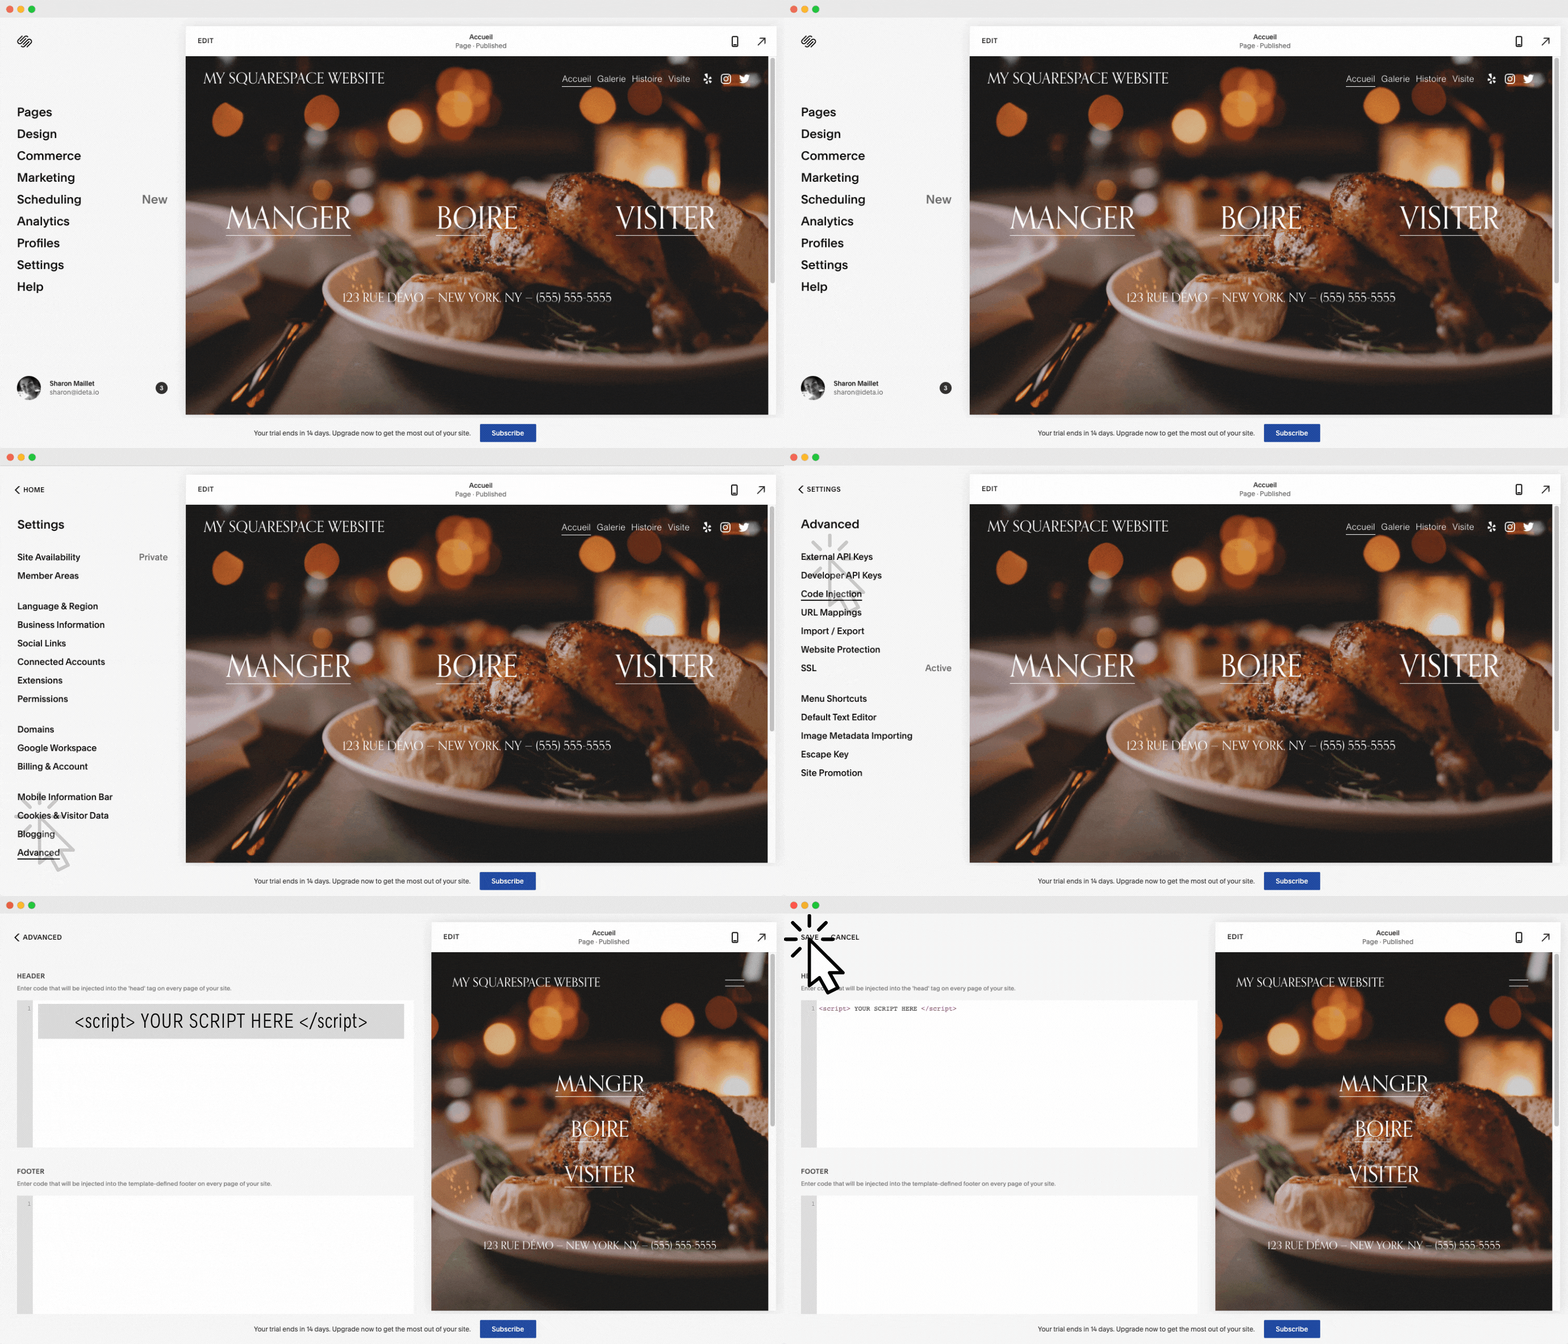
On all pages
To add the chatbot to all the pages of your website, follow the steps below:
- Go to the “Settings” section
- Go to the “Advanced” section
- Click on “Code Injection”
- Copy and past your script on the “Header”
- Save and publish your website
On a single page
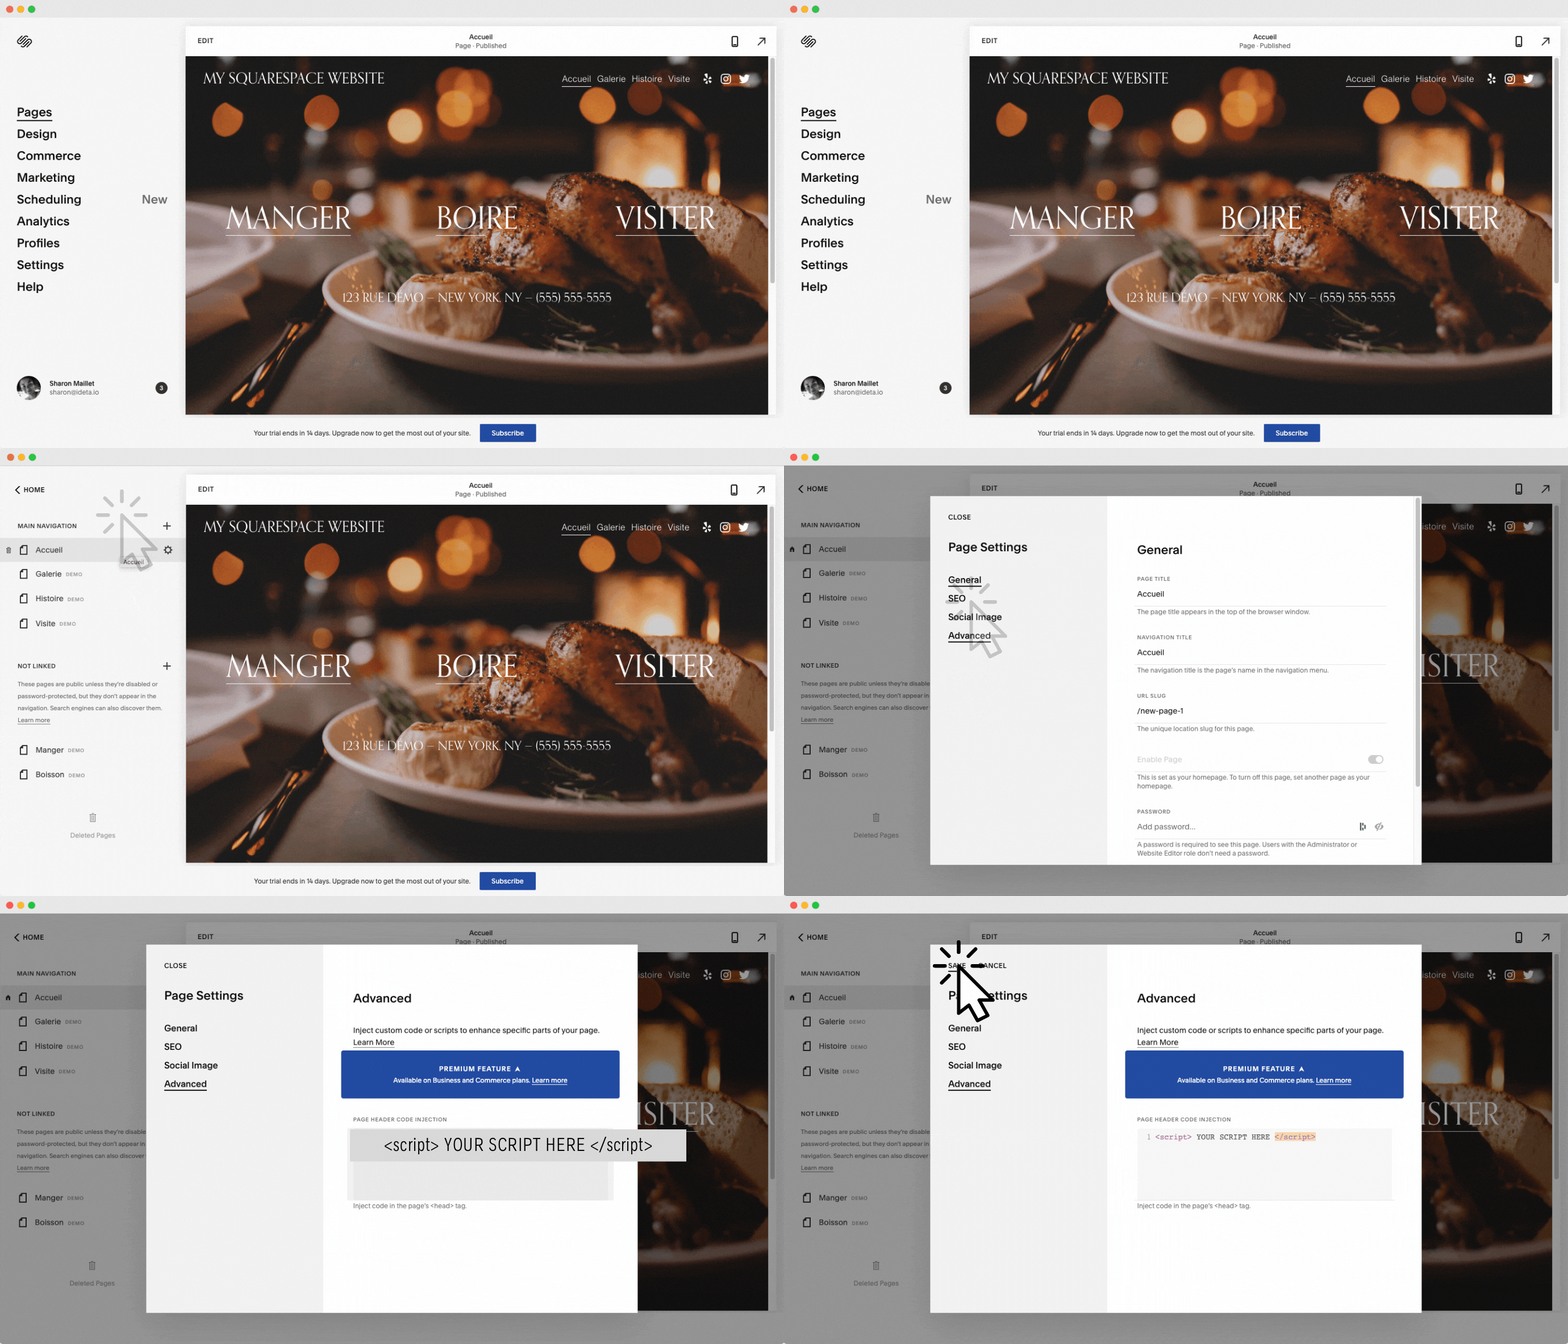
To add a chatbot on single specific page of your website, follow the steps below :
- Go to “Pages”
- Choose on which page you want to add your chatbot
- Click on “Advanced”
- Past your script
- Save and publish your website
Integration On Wix
Wix is a user-friendly website building app that offer its users hundreds of template to quickly start their website.
Its developer mode enables you to further customize your website by adding additional code. With a chatbot on Wix, you will be able to talk with your website’s visitor and answer their questions automatically.
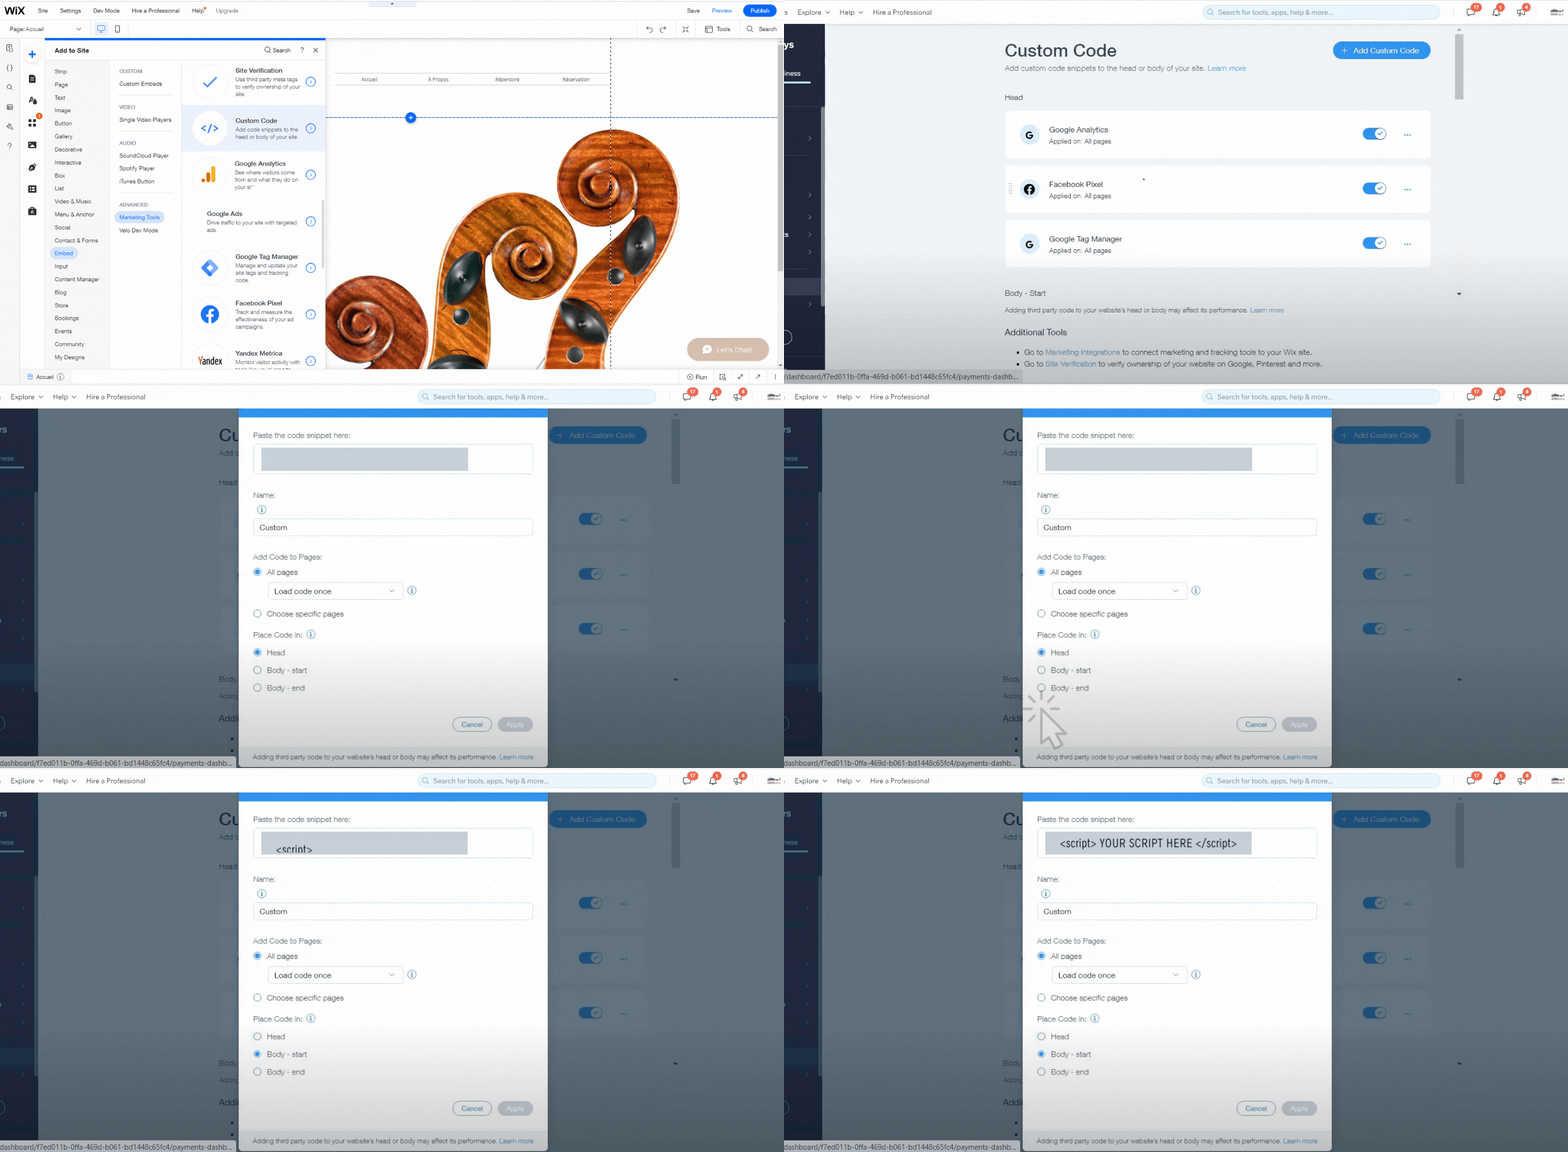
On all pages
Take to following steps to add a chatbot on Wix:
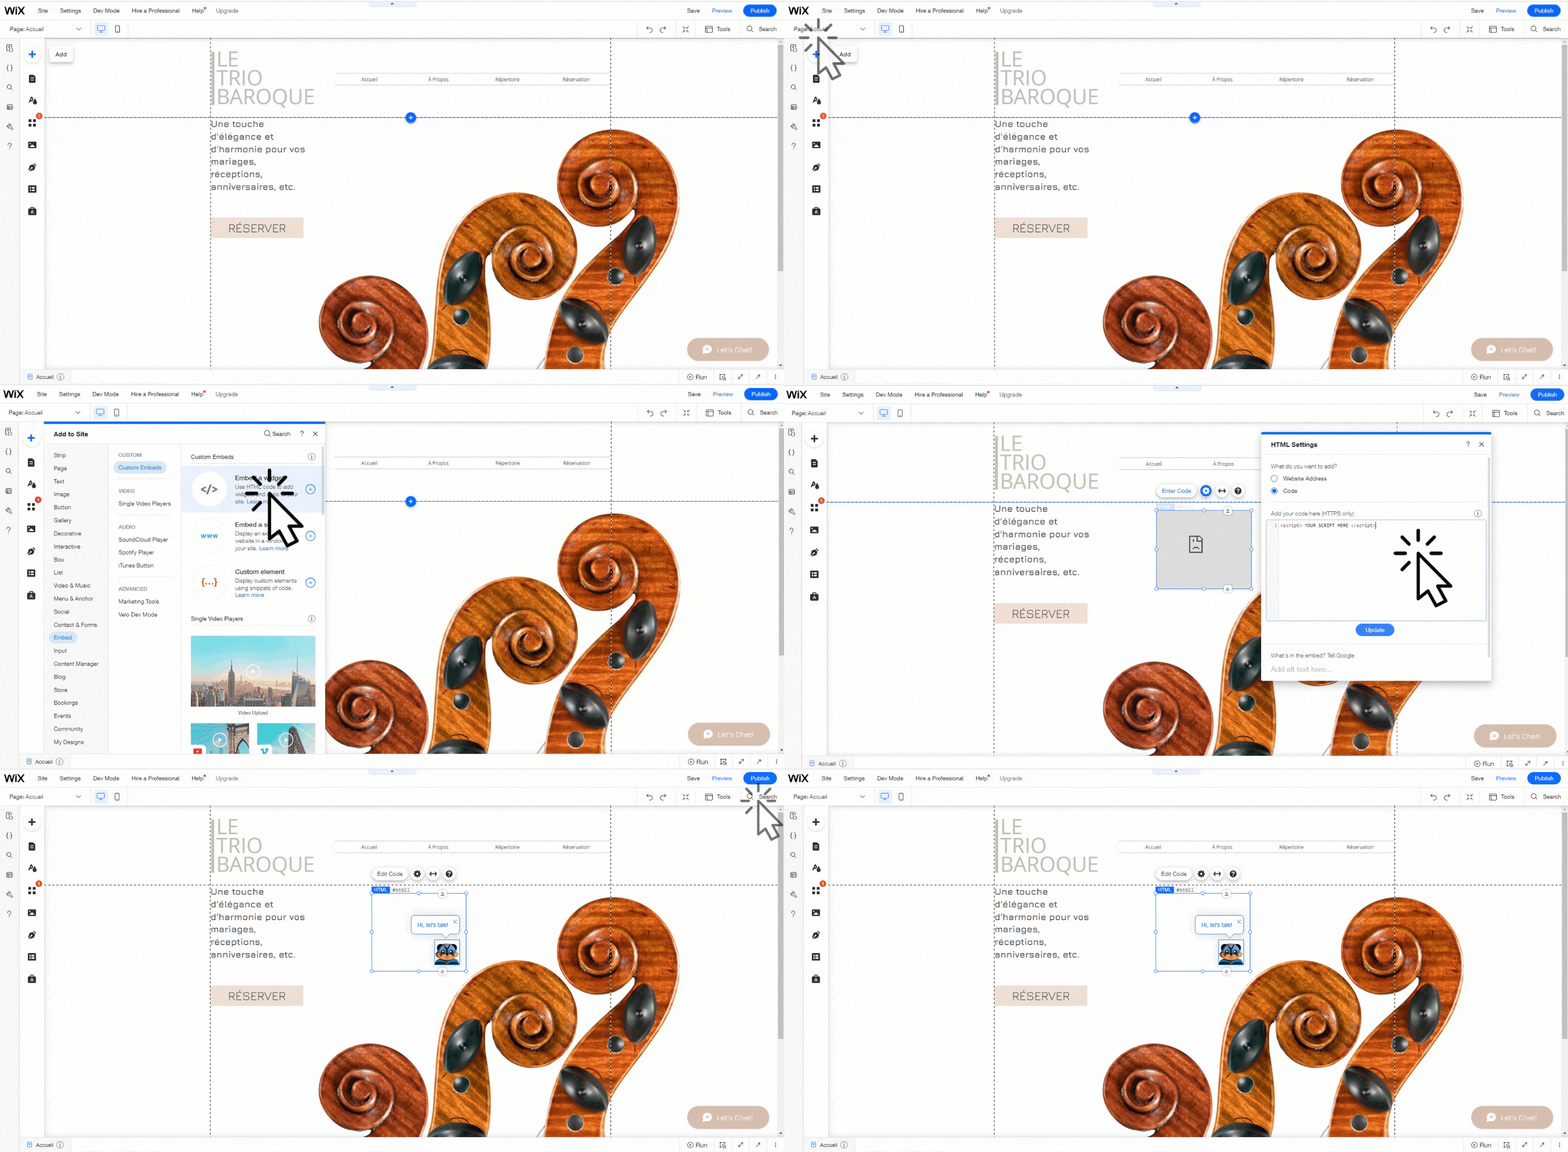
- Click on “Add” > “Embed” > “Marketing Tool” > “Custom Code”
- This will open a new window. Click on “Add Custom Code”
- Choose to add you code to “All Pages” and in the “Body - start”
- Save and publish your website
On a specific page
Follow the steps below to install your chatbot on a specific page:
- Choose the page you want to integrate your chatbot
- Click on “Add” and “Embed a widget”
- Copy and past your script
- Choose were to put you chatbot
- Save and Publish
Integration on Prestashop
Prestashop is a open-source ecommerce platform with a data management system. It’s free and it enables retailer to create and manage their online store. It launched in 2007 for a french student project and it rapidly gained popularity thanks to it interface and customizability. Now Prestashop run about 270 000 stores around the globe and offer lots of module.
Follow the steps bellow to install Ideta’s chatbot to Prestashop :
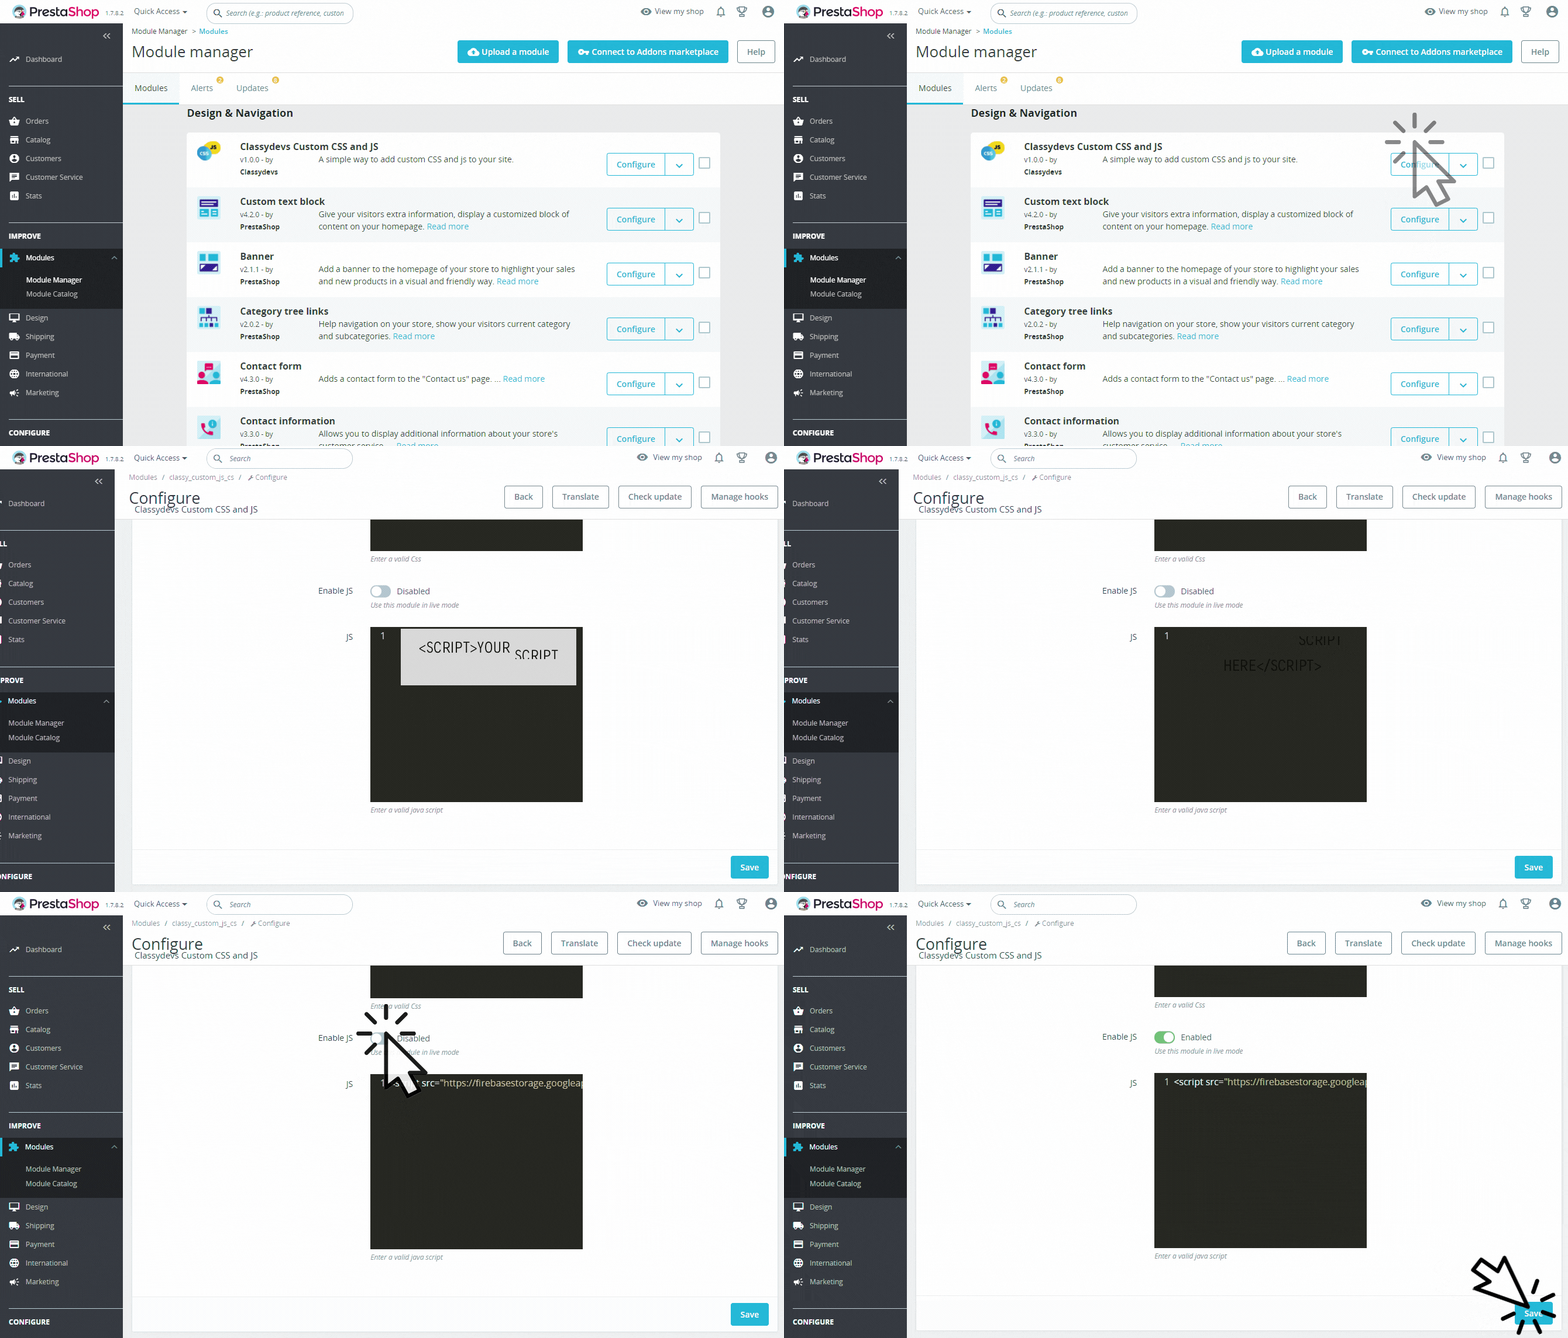
- Install a custom CSS and JS module of your choice
- Past your chatbot’s script to the JS section
- Enables JS code
- Don’t forget to save and publish
Integration Everywhere with Google Tag Manager
A Tag Manager give you the ability to add and update your own tags, which are small snippets of code, on your website without the need to modify your website’s code.
By adding the chatbot via Google Tag Manager, your marketing teams can be independent from the developer team and change the script as they wish.
However, be careful because some ad-blockers tend to block scripts coming from a Tag Manager, so some of your visitors may not be able to see the chatbot.
Take to following steps to install it :
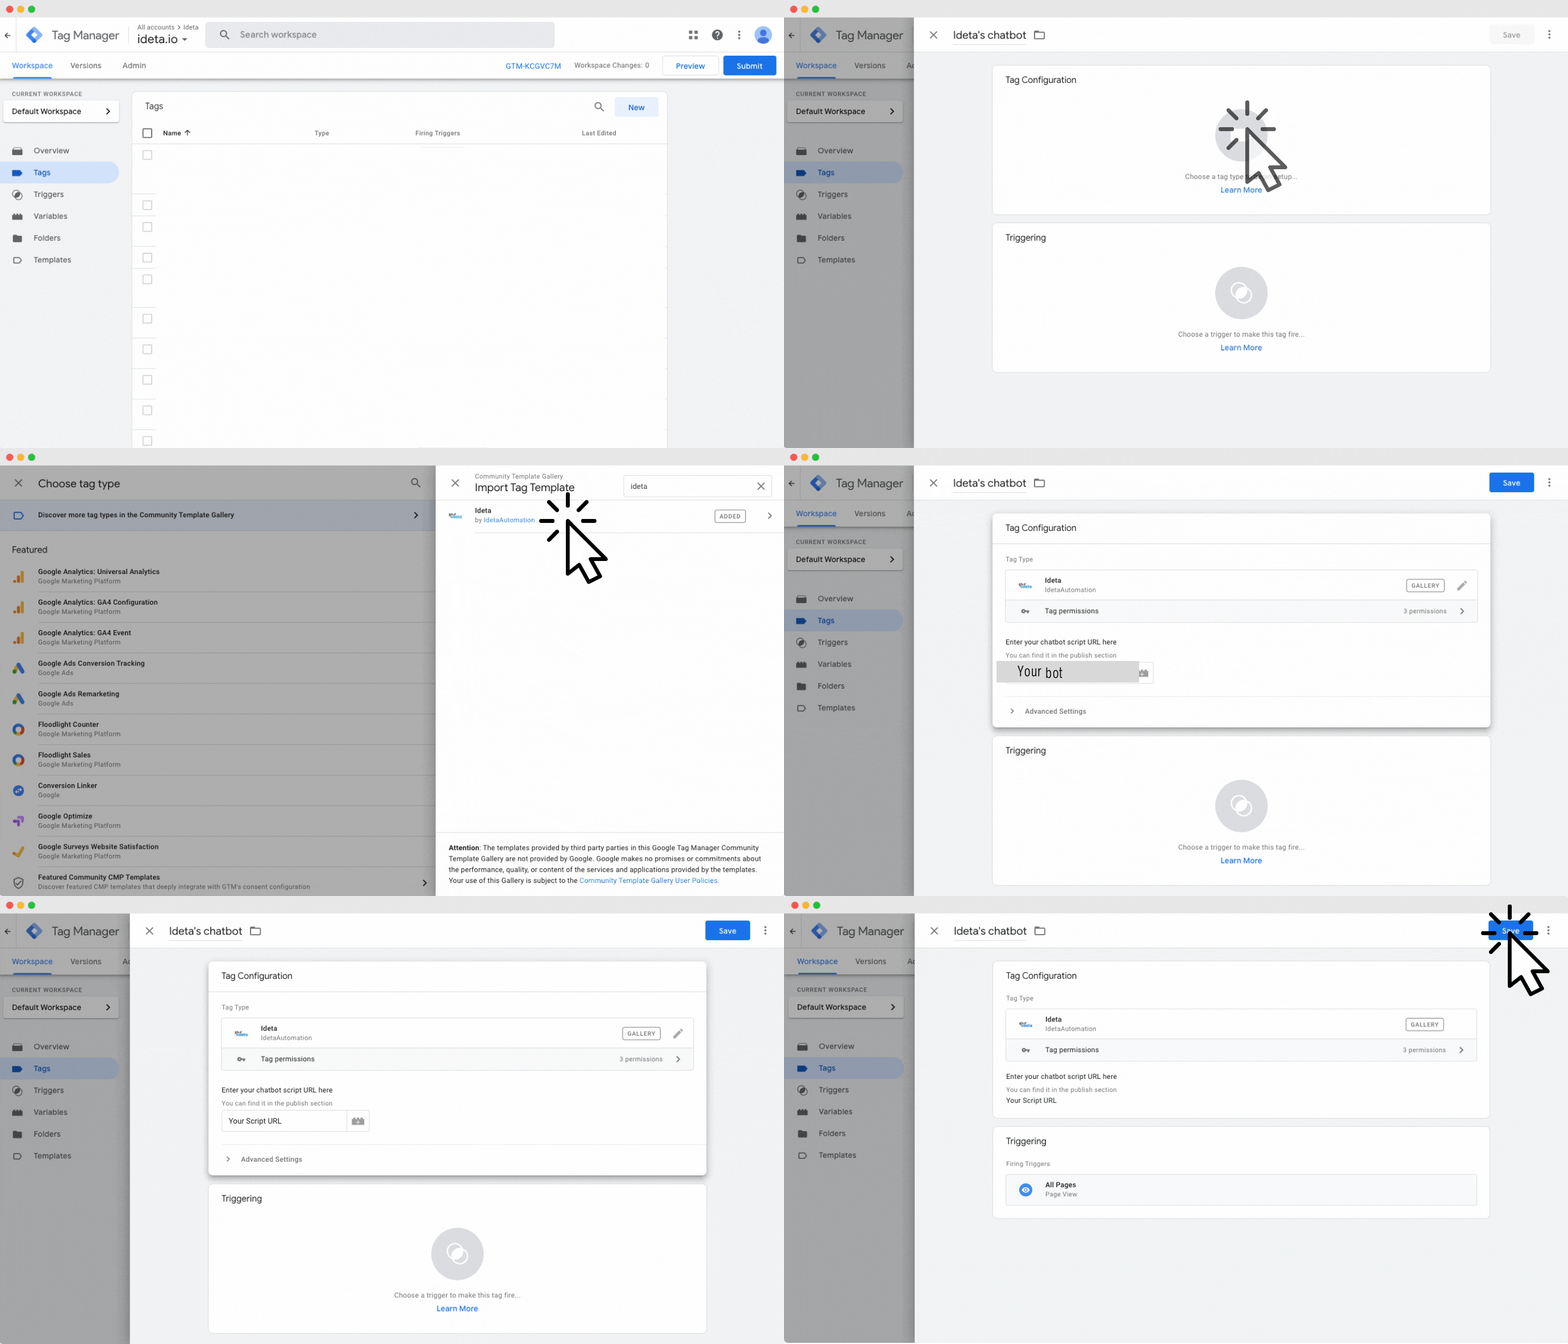
- Create a new tag
- Add a new tag from the communities template
- Search for “Ideta” et click on it
- Choose Ideta’s template and give the authorization
- You have to enter your bot URL. Be careful to not copy and past the quotation

Other integrations?
Do you need to integrate your chatbot on another platform that’s not in this list? Just contact us or leave a post in out forum and we will see what we can do!


